
Making kefir cheese is a bit like discovering a “superpower” in your kitchen. You start with living fermented milk (milk kefir), and by simply draining it, you obtain a creamy, spreadable texture, similar to fresh cheese, sometimes denser, sometimes lighter, depending on the method. The taste is mild, slightly acidic and, above all, totally customisable. You can keep it plain, flavour it with herbs, make it firmer for slicing, or lighter for spreading on bread.
What makes this preparation so interesting is that it’s based on a simple principle: fermentation transforms the milk, then draining separates the whey from the thicker matter. And because the base is kefir, you’re already using a ‘living’, fermented food, which appeals to people who want a more natural, homemade and often more easily digestible diet.
If you’re already into homemade fermentation projects, I’d also recommend exploring kombucha. It’s a different kind of fermentation, but just as satisfying. To get off to a good start, Natural Probio offers a ready-to-use culture, which is very practical when you want regular results from the outset: discover the Natural Probio authentic kombucha strain. Many people alternate between kefir and kombucha to suit their tastes, and this makes it possible to vary the drinks and fermented preparations at home.
In this comprehensive guide, I show you how to make kefir cheese reliably, without any headaches, with all the possible variations, texture tips, common mistakes, and a big troubleshooting section, because that’s often where it all comes down to.
When we say “kefir cheese”, we’re not talking about a hard ripened cheese like Comté. It’s usually a fresh cheese made by draining milk kefir.
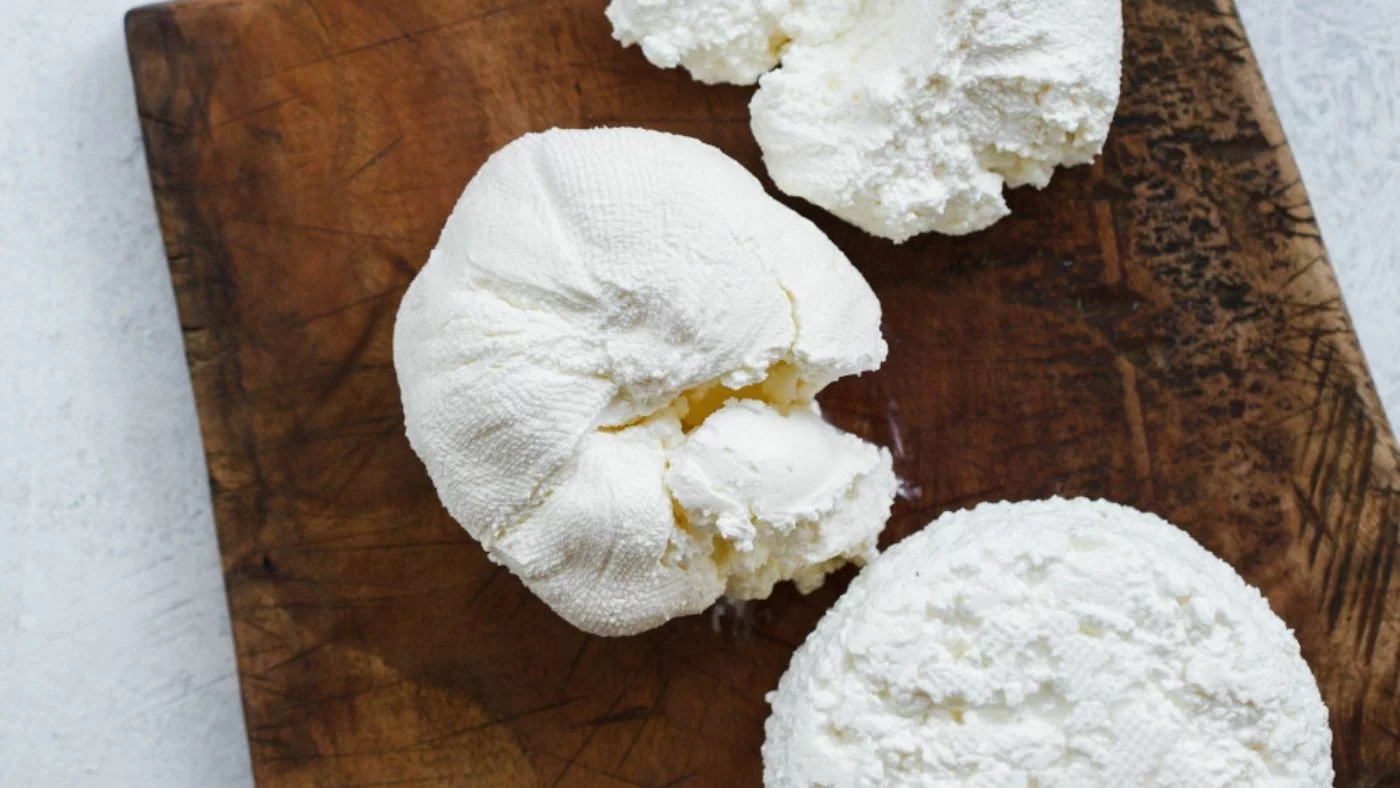
Milk kefir is already fermented milk. When you leave it to drain in a fine cloth, some of the liquid runs off: this is the whey. What remains in the cloth becomes a thicker mass: this is your kefir cheese. The longer you drain, the denser the cheese becomes.
It’s important to understand that this “cheese” is not a fixed recipe. Rather, it exists as a spectrum of textures.
If you drain a little, you get a thick cream, ideal for spreading or replacing a cold sauce base.
If you drain for longer, you will obtain a texture similar to that of a fromage frais such as “drained faisselle”.
If you drain for a very long time and press lightly, you can end up with a firmer dough, which can be shaped into small balls and even dried slightly.
The taste of kefir cheese is influenced by two things: the taste of the original kefir and the draining time. A more fermented kefir gives a more acidic cheese. A milder kefir will give a rounder, milkier cheese.
Then you can add flavour. And there’s a huge playground here, as long as you follow a few rules to ensure that the cheese is preserved properly and doesn’t ‘take on’ too strong an odour.

There are many ways to make homemade cheese, but kefir cheese has a number of practical benefits.
You don’t need rennet, special ferments or a sophisticated thermometer. All you need is successful milk kefir, a clean cloth and a little patience.
Kefir is a “living” fermentation from grains. Many people appreciate this traditional approach. And if you like this approach, you’ll probably like other home fermentations too, especially kombucha. For those who want a reliable starting point, the Natural Probio kombucha culture is a very popular option, as it simplifies getting started.
You control the milk, the fermentation time, the final texture, the salt and the flavourings. You know what’s in it, and you can adapt it to your digestive tolerance and tastes.
There’s no need for a complicated list here. But the material plays a huge role in the result, especially the texture.
It all starts with a successful milk kefir. If your kefir is too liquid, too separate, too acidic, or has a strange smell, the cheese will be less pleasant. A balanced kefir produces a soft, clean cheese.
The best scenario is kefir fermented until it is slightly thickened, tart but not aggressive, with a fresh smell.
The fabric serves to retain the material and allow the whey to pass through. The finer the cloth, the smoother the result. A cloth that is too coarse allows too much material to pass through, resulting in a grainy cheese.
A cheesecloth, clean fine cloth or even cheesecloth works very well. The important thing is that it’s clean, doesn’t smell of detergent, and is reserved for food if possible.
Place the strainer over a bowl. The whey drains into the bowl. It’s simple, clean and effective.
The sieve must not touch the bottom of the bowl, otherwise the cloth will be soaked in whey and the draining will be less effective.
If you want a firmer cheese, you can add a slight weight to the cloth once the cheese has already started to thicken. You mustn’t crush it from the start, otherwise you’ll force it to separate too abruptly and risk a less fine texture.
Before turning into cheese, you need to prepare a suitable kefir.
Kefir that is too young and very dairy will give a milder cheese, but sometimes one that is less structured. Kefir that is a little more advanced will give a firmer, more “fromage frais” cheese.
For a good balance, many people ferment their kefir until it thickens slightly, without going as far as massive separation. If your kefir separates into large blocks with a lot of whey already present, this is not serious, but you will get more acidity.
The warmer the weather, the faster the fermentation process. In summer, your kefir may be ready earlier than in winter. For a smooth texture, avoid fermentation that is too hot and too long.
Whole milk often produces a creamier cheese. Semi-skimmed milk can give a slightly lighter texture. Goat’s milk gives a more distinctive taste, but the cheese can be magnificent and very digestible for some people.
If you’re sensitive to lactose, you should know that fermentation transforms some of the lactose, but not necessarily all of it. Some people prefer to make their kefir with lactose-free milk before draining it. This can make a very comfortable cheese to eat.
This is the main transformation. And this is where you choose your texture.
Place your fabric in the colander, leaving enough fabric hanging out so that you can close it and hang it up if necessary. Pour the milk kefir into the fabric.
At this stage, you’ll see the whey start to run out. This is normal, and in fact a good sign: your kefir is well structured.
Close the fabric to form a kind of “bundle”. You can simply fold it in on itself. Some people prefer to tie it.
Then leave to drain. And that’s where time makes all the difference.
For a thick cream, leave to drain for a shorter time. The result is very spreadable, almost like a sauce base.
For a fromage frais texture, leave to drain for longer. You’ll end up with something denser, that will fit on a spoon.
For a firmer dough, leave to drain even longer and press lightly at the end. The result is a mass that can be shaped.
The crucial point is that draining is not an exact science. The humidity of your kefir, the temperature of the room and the fabric will all affect the speed. The best thing is to look and feel, rather than follow a precise minute.
Both exist.
At room temperature, draining is quicker and fermentation can continue slightly, increasing acidity.
In the fridge, draining is slower and gentler. You often get a rounder flavour. If you’re sensitive to acidity, this is often the best option.
Many people start by draining at room temperature, then finish in the fridge to stabilise.

Once the texture is right, you can decide whether to keep it plain or season it.
Salt not only improves flavour, it also helps with preservation. A small amount of salt makes for a cheesier cheese.
If you’re looking for a very mild flavour, or if you use it as a sweetener, you can leave it unsalted.
Fresh herbs are delicious, but they add moisture and can reduce shelf life. If you want to keep them for longer, dried herbs or spices are often more stable.
Fresh garlic, for example, is incredible in a kefir cheese, but it’s also an ingredient that can ‘turn’ more quickly. If you use it, use it quickly.
Spreadable kefir cheese is perfect as a base for cold sauces. You can use it for an herb sauce on vegetables, a dip base for an aperitif, or even a sandwich base.
And if you like a fermentation routine, you can combine this homemade cheese with a fermented drink such as homemade kombucha. Natural Probio kombucha is a good starter, especially if you want a regular, clean-tasting kombucha.
Kefir cheese is sometimes referred to as “ripening” when it is left to dry slightly or rest so that the flavours can develop.
If your cheese is firm enough, you can roll it into small balls. It’s pretty, practical and keeps better if you put it in a clean jar.
Some people like to roll these balls in dried herbs, paprika or mild spices. This protects the surface slightly and gives a very pleasant taste.
Even without maturing, resting for a few hours in the fridge can improve the texture. The cheese holds together better and the flavour becomes more harmonious.
Yes, but you have to be realistic: this is not a hard cheese. You can obtain something drier, denser, perfect for light slicing or crumbling. To do this, drain it for a long time and leave it to rest in a cool place.
When you make kefir cheese, you get lots of whey. Many people throw it away… even though it’s a resource.
Whey can replace some of the water in certain dishes. It can also be used to add a slightly tangy touch to dishes, depending on your cooking habits.
Whey often contains lactose. If you are lactose intolerant, take care. You can try it in small quantities, or use it for purposes where it is diluted.
Even if you don’t use it straight away, you can store it in a clean container in the fridge for a few days and then decide.
Home fermentation is not dangerous if you follow simple principles. Kefir cheese is a sensitive food because it is rich, moist and has to be handled.
You don’t need to sterilise as you would in a laboratory, but the equipment must be thoroughly washed and rinsed, without the scent of washing-up liquid.
A fabric that smells like washing powder will give a bad, sometimes irritating cheese.
A normal kefir cheese smells fresh, milky and slightly acidic. It has a uniform surface. It can be very white or slightly creamy, depending on the milk.
A rotten smell, an abnormally pungent odour, a strange colour or an unusual viscous texture are signals to be heeded. If in doubt, don’t eat it.
It’s better to lose a batch than to force yourself to eat something that looks suspect.
This is the most important part, because this is often where people get discouraged. They want a texture that ‘looks like the photo’, and they don’t get it right first time. Texture depends on simple parameters, but you have to understand them.
Either the initial kefir was too young, or the draining was not long enough, or the cloth was too wide.
The simplest solution is to continue draining in a cool place. The cheese will thicken.
Either your kefir was over-fermented or drained at room temperature for too long.
To reduce the acidity, you can make a milder kefir next time, drain more in the fridge, and add a very light touch of salt to balance it out.
This happens if the kefir has separated strongly, or if the fabric allows certain elements to pass through, or if the draining is too aggressive.
Often, a slightly grainy texture can be corrected by gently stirring the cheese at the end, to homogenise it. Next time, ferment for a little less time and drain in a cool place.
You’ve simply drained too much. It’s not a failure. A drier cheese can be transformed into a preparation: mixed with a little cream, a drizzle of olive oil, or even a little fresh kefir, it becomes creamy again.
Once you’ve mastered the plain version, you can have some fun. The idea is to add flavour without damaging the preservatives.
A very stable version consists of adding dried herbs, sweet pepper and a dash of salt. It’s perfect on toast.
Very fresh, very spring-like. The zest adds fragrance without excessive moisture, if you dose it right.
Yes, it’s possible. Plain kefir cheese, then add honey or fruit when serving, not necessarily when storing. This prevents the fruit from giving off too much water and shortening the shelf life of the cheese.
If you make fairly firm balls, you can place them in a jar with a drizzle of oil and dried herbs. This will protect the surface. This method requires good hygiene and cool storage. This is a very tasty version, but it must be done properly.
How long it keeps depends very much on how you prepare and season it.
Cheese generally keeps for several days in a clean, cool, closed container. The wetter it is, the shorter it will keep. The saltier and drained it is, the longer it will keep.
Do not dip a dirty spoon into the jar. Take a portion with a clean utensil, close and put back in the fridge. It’s a small detail, but it’s often what makes the difference between a cheese that stays good and one that goes bad.
This is not ideal. Freezing can break the texture. It’s not impossible, but the result may be grainy when thawed. If you freeze it, plan to use it in a preparation, not necessarily as a sandwich.
Many people with lactose intolerance find kefir more tolerable than conventional milk, as some of the lactose is converted during fermentation. By transforming the kefir into cheese, you also remove some of the whey, which can change tolerance for some people.
But tolerance is an individual matter. If you are very sensitive, you can make your kefir with lactose-free milk from the start. This often results in a cheese that is very comfortable to consume, without changing the pleasure.
The subject of children often comes up. Homemade kefir cheese is a rich, fermented food with a mild taste. Many children accept it well, especially plain or lightly salted, or mixed with other foods.
That said, as with any fermented food, it’s best to introduce it gradually, in small quantities, and to respect your age, eating habits and any sensitivities you may have.
Kefir cheese doesn’t have to be “complicated cooking”. It shines in simple uses.
Bread, kefir cheese, a drizzle of olive oil and a pinch of salt. It’s already excellent.
Mixed with a little moister kefir cheese or a little kefir, you get a perfect sauce for vegetables, potatoes or salads.
A lighter spreadable base than some industrial cheeses, with a fresh taste.
With mild spices and herbs, it’s an effortlessly impressive dip.
And if you like to serve a home-fermented aperitif, you can accompany it with a homemade kombucha. To get you started, the Natural Probio strain of authentic kombucha is perfect for getting started without getting lost in the technical details.
Even with a good method, you may run into a little trouble at first. Here’s how to react.
If the smell is simply very acidic, the kefir is often over-fermented. Next time, reduce the fermentation time and drain more in a cool place.
If the smell is unpleasant, such as “eggy”, “rotten” or “mouldy”, don’t eat it. Check the hygiene of the cloth, the container and the health of your beans.
This can happen if the cheese is still wet. Sometimes all you need to do is stir gently. This is not necessarily a problem. If you don’t want this to happen, drain a little longer.
Sometimes the acidity comes from draining at room temperature for too long. Try draining mostly in the fridge.
Add a pinch of salt and leave to stand in the fridge for an hour or two. The flavour will change. Dried herbs also work very well.
If your grains don’t ferment properly, your kefir will be unstable and so will the cheese. Make sure your grains are fed regularly, in suitable milk, and that you maintain stable temperature conditions.
This is possible if the kefir is live and unheated, but results vary. Homemade kefir from grains generally gives a more regular and satisfying cheese.
This depends on the fluidity of the kefir and the fabric. The idea is to drain until you obtain a thick cream that holds together well. The best indicator is the texture, not the clock.
Yes, you need to drain them for a long time, in a cool place, and perhaps press them a little at the end of the process. You can then form small balls.
This is often because the kefir has separated a lot, or because the draining has been too aggressive. Gentle mixing can help, and a slightly shorter fermentation next time will improve the finesse.
It is often better tolerated than milk, as fermentation transforms some of the lactose. If you are very sensitive, using lactose-free milk from the outset is an excellent option.
Making kefir cheese means transforming a fermented beverage into a delicious, creamy and highly customisable preparation. The key to success lies in three things: a well-balanced milk kefir, a fine, clean cloth, and draining adapted to the texture you want.
Once you’ve mastered the basics, there’s no end to the variations you can make, from very mild plain cheese to herbs and spices, to firmer little balls. And if you like the idea of homemade fermentation, you can complete your routine with kombucha. Natural Probio’s authentic kombucha strain is a great place to start.